Scanners and scanner lensesThe high-end models of Nikon film scanners have recently attracted the attention of macrophotographers, not because of the scanner functionality, but because of the lenses built into these scanners. In particular, the lenses used in the best Nikon Coolscan models have been discussed by Marco Cavina (in Italian), Robert O'Toole, and posts in photomacrography.net. More in general, lenses from film and flatbed scanners have been repeatedly re-purposed for use in macrophotography and photomacrography, e.g. as described in posts on DPreview. This discussion is part of a small set of pages on scanners and scanner lenses:
The lenses used in the Coolscan 8000 and 9000 scanners have lately been the center of attention. There are no model names or numbers written on these lenses, and I am not aware of any "official" Nikon denominations of these lenses. Various logos combining schematic drawings of optical formulas with the ED acronym (Nikon's abbreviation for Extra-low Dispersion glass) have been used in the Nikon literature on these scanners. In online discussions (see above links), these lenses have been called "Scanner Nikkor ED" or "scanner Nikkor". As far as I am concerned, "scanner Nikkor 100 mm" is good enough to identify the lenses of the Coolscan 8000 and 9000 in the present discussion. Nikon also made lower-cost film scanners with significantly lower optical resolution. The lenses used in these models are not particularly exciting, usually do not include ED glass elements, and you can get better results in macrophotography with other types of lenses. The scanner lenses discussed on this page lack an adjustable lens aperture. There is no real point in trying to add one, since scanner lenses are designed to provide the best image quality fully open. If you really need a lens with an adjustable aperture, you are better served by a good macro lens or copy lens. These scanner lenses are, instead, good when used in focus stacking, where the depth of field of the final image is arbitrarily high without involving the loss of resolution inherent in stopping down the lens aperture. They are also good for purposes close to their intended use, e.g. flat subjects like microscope slides and microchips imaged in an orientation perpendicular to the optical axis. All these lenses are optimized for a given magnification (see below for the lens of the Coolscan 8000 and 9000). You are welcome to test them at other magnifications, but you probably should not expect equally good results at magnifications far from their design parameters. Nikon Coolscan 8000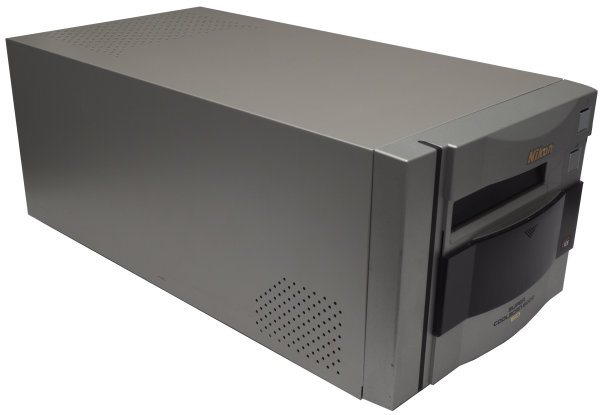
The Nikon Super Coolscan 8000 ED film scanner, and its successor Super Coolscan 9000 ED, are large-format film scanners capable of 4,000 dpi optical resolution. These scanners are known to give excellent image quality, but are also physically large, slow, and noisy. Properly flattening large-format roll film in some of their film holders is notoriously difficult, and the plastic film holders are known for wearing out. Their price was positioned above 35 mm scanners but well below professional drum scanners. In addition to these models, Nikon also made the Super Coolscan 4000 ED, 5000 ED and V ED, with the same optical resolution but designed only for 35 mm and smaller films (as well as microscope slides). These model names are abbreviated in the following discussion as Coolscan 8000, etc. At present, Nikon no longer sells film scanners, but a number of flatbed scanner models with comparable film-format capabilities and lower prices are available from other brands. They additionally offer the capability of scanning photographic prints and paper originals. Alternatives to scannersWhile these Nikon film scanners are primarily of interest to professional photographers and institutions with relatively large film archives that need digitizing, they are essentially niche products. Photographers who only need to digitize 35 mm film are better served by other solutions. For example, Finnish photographer Pekka Potka, already years ago, showed how cheap slide duplicators without built-in optics can be mounted at the front of a digital camera with a macro lens. The amount of extension between lens and slide depends on the sensor size (for 35 mm film, the macro lens must work nearly at 1x on full-frame sensors, and 0.5x on Micro 4/3). Pekka Potka's blog is no longer available online, but other photographers have used his method or rediscovered similar ones that use a macro lens and digital camera, and written about them (e.g., in no particular order, 120 Studio, petapixel.com, another on petapixel.com, jamiemphoto, photo.net, panotools.org, mfphotography.ca). These methods have even been compared favorably to using a professional drum scanner on medium-format slides. Photographer Peter Krogh confessed to have used digital cameras to scan film for the past 20 years, and gave details on a couple of camera digitizing setups. The slide duplicator in Pekka Potka's method only serves to keep the slide in the right position and to eliminate stray light. It is, however, a very significant improvement in several respects over digitizing methods that use copy stands or tripods to hold the camera above a slide or film strip in a carrier placed on top of a lightbox. 
In the film era, an accessory for holding a film strip or mounted slide at the right distance in front of a suitable lens could be added to bellows designed for high-magnification photomacrography with SLR cameras. This type of setup is also potentially useful for digitizing legacy film images, although far more expensive than a slide duplicator. Pekka Potka's method digitizes color slides with excellent results and at a cost orders of magnitude lower than a film scanner (at least if you already own the camera and macro lens). Using a very diffused illumination of the film helps to make dust, scratches and film grain less conspicuous. I use a LED panel much larger than the film frame, with built-in diffuser, placed some 20 cm behind the film. The slide duplicator has its own opal plastic diffuser placed about 5 mm away from the film. I mounted a black cardboard baffle around the end of the slide duplicator to reduce glare from the LED panel and make it easier for me to see the LCD screen of the camera. I stop down the Olympus 60 mm f/2.8 macro lens to f/5.6 for best resolution, or to f/8 for unusually warped film. Typical exposure times are well under 1 s. I mounted all components of the digitizing system on a 30 cm long 12 mm dual-rail system for cinematography, of the type often used for filming with digital cameras. A broad range of low-price components for these rail systems are easily available from Chinese sellers on eBay. I placed a long-lens support under the slide duplicator to reduce the risk of vibration. The slide duplicator in my possession ends in a 52 mm male thread, and I adjusted the length of the tube by adding a couple of empty 52 mm filter rings to achieve the desired distance. A step-up ring connects the filter mount of the lens to the tube. The 12 mm rail system is sufficiently rigid for this purpose, especially if you choose steel-tubing rails instead of aluminium or carbon-fiber ones. For critical setups where the maximum rigidity is necessary, replace the hollow rails with a pair of 12 mm solid stainless steel rails designed for CNC machines. I store the rail system when not in use with LED panel, lens support and camera support still mounted in the right positions, so that I can quickly set it up again when needed without introducing variables that might affect the consistency of results. Once I will be finished with my negatives (this is a long-term project with no clear schedule), I may decide to recycle the components of the digitizing setup for other purposes. With this method, I was typically able to digitize a box of 36 slides in 3 to 5 minutes, with autofocus and automatic exposure doing an excellent job of compensating for slide variations. I still use a flatbed scanner for photographic prints and paper originals, but would no longer think of using its built-in film scanning capabilities. Color slides are easy to digitize with the camera method. Color negatives, on the other hand, are the most difficult to digitize. Given the large amount of post-processing necessary to convert them into acceptable digital color positives, for occasional digitizing you might be better off scanning color prints instead of color negatives. Adobe Lightroom and other software packages for digital photography, as well as some scanning software, provide some help with the task of converting color negatives to digital positives on a more regular basis. High-resolution, slow films like Kodachrome are said to contain detail equivalent to up to 140 Mpixel in a 36 by 24 mm frame. However, I am fully satisfied with 16 Mpixel images digitized from my own slides, and I can clearly see the film grain in the digitized images. The film grain is proof that a higher pixel count would not record any additional image detail, but a visible grain is confirmation that autofocus worked right. The proportions of a Micro 4/3 frame differ from those of 36 by 24 mm. I usually digitize 35 mm film by recording as much as possible of the horizontal 36 mm frame width. This results in black bars at the top and bottom of the digitized image, which I remove only when I need to use the picture. In practice, a 16 Mpixel Micro 4/3 camera (e.g., the Olympus E-M1), with a pixel count of 4608 by 3456, corresponds to a 35 mm film scanner resolution of 3456 / 2.5 / 24 * 25.4 * 2 = 2,926 dpi, where 2.5 is an estimate of the actual resolution of the camera in pixels per line pair after demosaicing. This calculation assumes that the camera, not the lens, is the limiting factor of resolution. The Olympus E-M1 Mark II in 50 Mpixel enhanced resolution mode (8,160 by 6,120 pixels) corresponds roughly to a 5,200 dpi scanner when digitizing 35 mm film (with the same assumptions). Some camera manufacturers are aware of the general trend toward using digital cameras as replacements for film scanners. The Nikon D850 DSLR, for example, includes a "negative digitizer" mode that supposedly helps to automate the scanning of color film negatives. This feature has been criticized for applying automatic color corrections to individual frames. This makes it impossible to subsequently process the images in batch for further improvement. Nonetheless, it is a sign that we may expect better color-negative inverting capabilities in some of the future high-end digital cameras. eBay is currently flooded with very cheap 35 mm slide digitizers made in China, sometimes advertised in other countries at incredibly overinflated prices. They contain a dedicated digital camera (with the same sensor used in cheap webcams) and lens, and properly speaking they are not scanners because they photograph the whole film frame at once. To get a good guess of their capabilities, you only need to ask yourself whether a digital camera and lens built into a 30 € product are likely to approach the image quality and dynamic range of a camera and lens costing well over 2,000 €. The answer should be obvious. Scanner technologyModern film scanners offer an advantage not available in present digital cameras. In addition to RGB scanning, film scanners often output an NIR scan that records dust, fibers and other NIR-opaque objects contaminating the film surface. This scan is used to interpolate the missing pixels from surrounding ones in the image. This works well with most color slides and color negatives, because their pigments are transparent in the NIR, and dust therefore clearly stands out in the NIR scan. Black and white negatives and some color films like Kodachrome, instead, make the NIR scan ineffective (silver particles and some color dyes in these films are NIR-opaque). With these films, the scanning software must instead take a guess at distinguishing between dust and dark film areas, based on the RGB image alone. Film scratches are in principle detectable based on their optical properties in the RGB scan. For one thing, scratches can have sharper edges than image details on the film, and an optical scanner resolution that appears overkill to record the detail present in the film images can actually help to identify these defects and automatically retouch them away. Image processing software like Photoshop can automatically retouch away dust and scratches from a digitized image, based on the RGB image alone. The results are usually better than manually retouching large-format films before scanning. 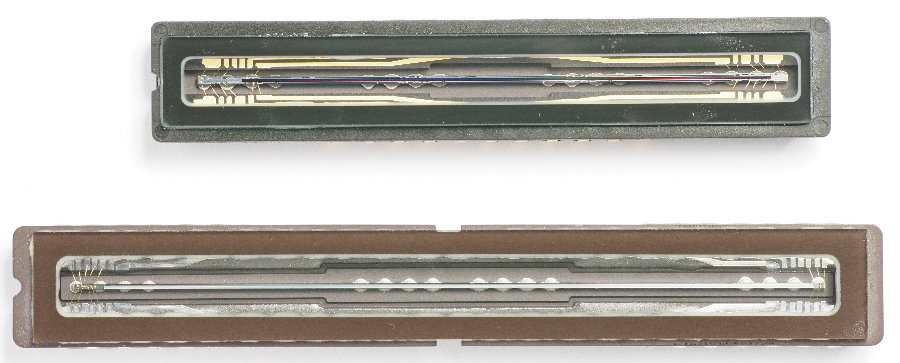
Top: sensor of Polaroid Sprintscan 4000 film scanner, with color filters. Bottom: sensor of Nikon Super Coolscan 8000 ED, not covered with color filters. 
The NIR filter, at bottom on the black background, is visually black. Most modern film scanners alternately flash red, green, blue and NIR LEDs on each scan line, and record each separate exposure of the scan line with a CCD linear sensor devoid of color filter matrix. Several modern scanners use multi-line linear sensors to scan two or more lines simultaneously. Older scanners used a fluorescent lamp and a CCD sensors with three or four lines (or multiples thereof) of pixels, each overlaid with a built-in color filter (see above picture). Yet older scanners used a fluorescent lamp and a filter wheel, and re-scanned the film frame three or four times, once for each filter. 
A final note about scanner technology, more as a technological curiosity than a relevant topic for the use of scanner lenses, is that a variety of optics are used to evenly illuminate the film. Older scanners used a fluorescent tube as light source, which lends itself to the illumination of a long linear subject. More modern scanners use LEDs, which are point-sources of light. As an example, the above figure shows the illumination optics of the Minolta Scan Elite 5400 II scanner. This scanner uses two rows of four LEDs each, oriented at 90° from each other, and combines the light from the two rows with a dielectric-coated beam splitter. An additional, strongly diffusing plastic sheet (not visible in the above figure) is placed at the exit of the optic train between the first-surface mirror and the film. Why two rows of LEDs? My guess is that one row provides white light for the scanning exposure, the second row NIR light for the dust-detection process. It is also possible that two rows of LEDS are used simply to increase the amount of light, but in this case the LEDs must be a special type that emits NIR together with VIS (e.g. by using a special phosphor that emits also in the NIR). Ordinary white LEDs emit little or no NIR, since this would waste energy and reduce their efficiency in the VIS. Other scanners use completely different illuminating optics. For example, the Nikon Coolscan 9000 uses a cylindrical light guide illuminated at both ends, with a diffusing white window painted along one side of the light guide to reflect diffuse light out of the light guide perpendicularly to its length. Considerations on lens resolution vs. sensor resolutionThis section discusses factors that affect the lens and sensor resolution. Based on theoretical considerations, it then attempts to compare the resolution of the scanner Nikkor 100 mm lens with the resolution of two digital cameras with different sensor sizes, and with the resolution of a macro lens currently regarded as one of the very best. The main purpose of this exercise is verifying whether the technical specifications of a given scanner allow us to judge whether the lens of the scanner has a sufficiently high quality (at a single magnification, or within a restricted range of magnifications) to compete with the best dedicated macro lenses. Image resolution is often measured in lp (total number of line pairs across a given dimension of the image, e.g. the image width or height), or lppi (line pairs per inch). Similarly, lens resolution can be measured in lppi, and in this case the measurement applies to the image size projected by the lens on the sensor or film. The resolution of a sensor, on the other hand, is primarily limited by its pixel count. There are more sophisticated ways to measure lens resolution, but the main purpose of this page is to interpret the specifications provided by the scanner makers, which in most cases consist exclusively of the dpi optical resolution of the scanner. Since we don't (yet) have the lens available for testing when we are shopping online for an old scanner to scavenge its lens, theoretical considerations can be applied to these specifications, in order to evaluate whether the lens can be useful in macrophotography. The maximum theoretical resolution of an imaging sensor with a pixel-raster architecture is 2 pixels per lp. This applies only in optimal conditions, i.e. high contrast between the dark and light line in a line pair, lines parallel to either the X or Y sensor axis, and each line projected onto the sensor covering exactly one pixel column or row. Any deviation from these conditions results in a variety of problems that include lower resolution, lower contrast, aliasing, moiré and color fringing. A Bayer sensor has an actual linear resolution after demosaicing of somewhere between 2 pixels/lp (i.e., the theoretical maximum) and 4 pixels/lp (for old cameras that use a strong physical anti-aliasing filter and a relatively unsophisticated demosaicing algorithm). In the absence of better figures of general applicability, I arbitrarily assume a 2.5 pixels/lp resolution as a reasonable value for a modern camera devoid of physical anti-aliasing filter. This fits the observation that image resolution in modern high-end digital cameras with Bayer sensors is close to pixel-level, i.e., only slightly less than the theoretical maximum resolution of a sensor without Bayer matrix. The specified lens resolution of 4,000 dpi on the subject side (i.e. the film to scan) of the scanner Nikkor 100 mm corresponds to a maximum theoretical resolution of 2,000 lppi. For the moment, I accept at face value the assumption, stated in other discussions of this lens, that the scanner Nikkor 100 mm lens is designed to operate at 1x. The actual magnification inferred from the length of the active portion of the scanner sensor and width of the scanned field (see above) is close enough to 1x (within 10%) to ignore in this context. If you want to have more precise figures, plug in the actual magnification of 0.9x (or 1.11x if the lens is reversed) in the following calculations. As a comparison lens, the CoastalOpt 60 mm Apo is one of the best and most expensive current macro lenses for the full-frame format. It is not just a macro lens, but is additionally a true apochromat and is designed for an extended spectral transmission from NIR to NUV. These design parameters, together with the limited number of built specimens and the necessity of lengthy manual calibration on the assembly line, largely explain its high price. This lens has been rated by Lens Rentals in laboratory tests at 1,300 lp per image height (24 mm), fully open (f/4), at 0.2 x magnification, and at the center of the image circle. The averaged value across the frame is 975. Second runners were not far behind, at roughly 80% of this resolution. The results for the CoastalOpt 60 mm Apo translate to 1,376 lppi at the center and 1,032 lppi averaged along the frame height, measured on test images produced by a 36 Mpixel full-frame sensor. If we regard this lens as excellent on full-frame, any scanner lens that approaches or exceeds its resolution at a useful magnification and with good additional performance (low aberrations, high contrast, good color correction, low distortion) should be fully satisfactory for most macrophotography uses on full-frame. The full-frame Sony Alpha 7 camera has a 24 Mpixel sensor, with 6,000 by 4,000 pixel count and an active area of 35.8 by 23.9 mm. Based on an estimated resolution of 2.5 pixels/lp (see above), this sensor can resolve up to 6,000 / 2.5 = 2,400 lp on the horizontal axis, i.e. 2,400 / 35.8 * 25.4 = 1,703 lppi. This is moderately below the 2,000 lppi specified for the lens. Unless the thickness of the filter stack of the camera substantially impairs the lens resolution, the limiting factor in this example is the sensor, not the lens. The Olympus E-M1 Mark II has a Micro 4/3 20 Mpixel sensor. The actual pixel count is 5184 by 3888 and the active sensor area 17.3 by 13 mm. The same calculations as above yield 2,074 lp horizontally across the sensor, and 3,045 lppi for this sensor. This is significantly higher than the 2,000 lppi of the lens resolution, and in this case the lens is clearly the limiting factor. This sensor requires a lens resolution around 6,000 dpi. The Olympus E-M1 Mark II is also capable of enhanced resolution by shifting the sensor multiple times in half-pixel increments and combining the multiple exposures in-camera. Processing the results into a higher-resolution image is not trivial, because shifting by one whole pixel allows the same image area to be successively sampled by different pixels through Bayer filters of different colors. An 80 Mpixel image is generated in-camera and can be saved in lossless file formats, while in other formats including JPG the image is always reduced in-camera to 50 Mpixel. A comparison of 80 and 50 Mpixel images show little visible improvement in the 80 Mpixel images. 50 Mpixel correspond to approximately 8,190 by 6,143 pixels (horizontal pixel count is given by sqrt(50/20) * 5,184 = 8,190, where sqrt indicates square root and 5,184 is the horizontal pixel count in the native 20 Mpixel resolution). This provides 4,095 lp horizontally, or 6,012 lppi, which requires a lens resolution close to 12,000 dpi to match. Uncertainties are involved in this calculation, since 50 Mpixel is neither the native sensor resolution, nor the actual image resolution as recorded with sensor shifting. Nonetheless, the 50 Mpixel resolution is far more than the scanner Nikkor lens specifications can provide on this sensor size. A few Olympus Pro lenses for Micro 4/3 (e.g. the 300 mm f/4, and the 7-14 mm f/2.8 in the center of the frame), when shooting with the 50 Mpixel resolution in optimal conditions, show substantially more image detail than with the native 20 Mpixel resolution. I interpret this as a proof that these lenses are capable of higher resolution than the 6,000 dpi required for a 20 Mpixel resolution. This performance is made easier to achieve, of course, by the small image circle necessary to cover Micro 4/3 sensors. In conclusion, taking the lens specifications at face value, the scanner Nikkor 100 mm is suitable for full-frame sensors up to 24 Mpixel, but not good enough for a 20 Mpixel (or even 16 Mpixel) Micro 4/3 sensor. On the other hand, a Micro 4/3 camera with a 20 Mpixel sensor is a good platform for testing the resolution limits of this lens in the center of the frame, since the resolution of this sensor in lppi exceeds the lens specifications. The lens of high-end 35 mm Nikon film scanners like the Coolscan 4000 and 5000 is reported to be a 38 mm f/2. It is designed for use with a thin glass plate covering the sensor, and the specified optical resolution of these scanners is 4000 dpi as well. These lenses use only 7 elements (compared to the 14 elements of the scanner Nikkor 100 mm) and only need to cover an image circle on the subject side of 24 mm. Their asymmetric optical formula may suggest that they are designed for an optimal magnification different from 1x, but to tell for sure I need to know the length of the active portion of the sensor of these scanners. The f/2.8 aperture of the 100 mm lens (which becomes effective f/5.6 at 1x) is not the limiting factor in the resolution of this lens, so the faster f/2 speed of the 38 mm lens, by itself, is not a sufficient reason to prefer the latter lens. While the 38 mm is compact and lightweight, the 100 mm remains interesting for its high working distance. Lens sourcesA good portion of the second-hand specimens of scanners like the Nikon Coolscan 8000, 9000, V, 5000 and 4000 are currently advertised on eBay for unrealistically high prices that often exceed the original sales prices of these models. Reasonable prices are in the lower hundreds of €/£/US$ for a functioning Coolscan 8000 or 9000 in good condition. A non-working "for parts" specimen should sell for less than half of a working one. The Coolscan 9000 original price was about 800 € less than the Coolscan 8000, but the 9000 is invariably advertised at far higher prices than the 8000 on eBay, in spite of all technical specifications being the same. The 9000 was designed with the main goal of reducing the production cost of the 8000, rather than improving on it. The lens of the 9000 is very similar to, but not exactly the same as, the 8000 lens. Published tests have shown no visually detectable difference in images produced with either lens on current digital cameras. If it should turn out that the lens of the 9000 is optimized for a significantly different magnification than the lens of the 8000 (in other words, if the sensor length differs in the two scanner models), it might be desirable to have both lenses. I don't have a 9000 available, so I have no way of finding this out first-hand. Although the lenses used in the best Nikon Coolscan models are indeed excellent, it is likely that the lenses of the best film scanners by other brands are comparable in image quality. These top-of-the-range scanners, when available "for parts" at heavily discounted prices, may be an interesting source of high-quality lenses. Cheap scanner models (of any brand), on the other hand, are not likely to contain good lenses. For example, filmscanner.info reports that the lenses of many scanners have a poorer resolution than their sensors can record. This web site quotes many scanners as having an actual resolution below 50% the specifications because of poor lens performance, and cheap models as reaching only 30%. This web site is a useful source to check for avoiding disappointing purchases, but there are far more scanner models on the second-hand market than those tested on this site. Some flatbed scanners switch between different lenses for paper and film scanning, so you may get two lenses from one scanner. Other flatbed scanners use a moving optical group and a fixed one to switch between size and type of original. In this case, you should retain enough of the original magnification-switching mechanism to manually operate it. These alternative sources of scanner lenses are worth exploring, since virtually no Coolscan 8000 and 9000 at reasonable prices currently remain available on eBay (they were never commonplace to start with), and it will take time for new ones to come to market. Flatbed scanners have a relatively thick glass plate (usually 3-4 mm) between subject and lens. This thickness is similar to the filter stacks of digital cameras, so there is a good chance that the lenses of these scanners will work optimally when reversed on a large-format or full-frame sensor. This should make the lenses of flatbed scanners better corrected than those of film scanners when reversed on digital cameras. In both scanner types, there is a thin glass plate covering the scanner sensor. In the lack of publicly available, reliable scanner lens tests, one has to be careful to choose only the top models of well-known brands (e.g. Epson, Agfa, Canon), and not to pay too much. In particular, search and study the technical specifications of a given scanner model before pulling the trigger. I know of no instance where the scanner makers characterized the resolution of the lens alone, which is the specification we are really interested in. Many scanners specify a maximum image resolution obtained by micro-stepping the film or sensor and interpolating the results. This type of resolution is not relevant. In the lack of more useful data, the main specification you should care about is the optical resolution of the scanner, sometimes called native resolution. This, however, is most often the non-interpolated resolution of the sensor, not the resolution of the whole system including the lens. When an asymmetric resolution is specified (e.g., 4,800 by 2,400 dpi), the lower figure (2,400 in this example) is likely the optical resolution, and the only figure that counts. The higher figure refers to stepping the sensor in fractions-of-a-pixel increments along the length of the subject. With few exceptions, we do not know in advance the optimal magnification of scanner lenses. Therefore, when disassembling a scanner, it is important to measure the length of the active portion of the CCD sensor. Together with the maximum subject width, it indicates the optimal magnification and the size of the subject and image circles. The thickness of the glass plate of a flatbed scanner or film carrier (and any filters that may be present in the optical path) may also be an interesting measurement. Without this data, an unknown scanner lens extracted from a discarded scanner and sold on eBay is far less useful, and requires much testing by trial and error to discover its optimal parameters. Lenses thay may have been designed for scanners (as well as microfiche readers, typesetters and other devices) are sold on the surplus market, usually without any of the above information. These lenses are sometimes tested by photographers looking for photomacrography lenses, but in the lack of information about their design parameters of these lenses, few outstanding success stories have emerged from numerous random purchases. Cleaning a scanner lensIt is of course possible to clean the exposed front and rear element surfaces of a scanner lens, with the same methods used for camera lenses. However, disassembling a high-resolution lens to clean its internal elements is out of the question, since this will destroy its factory alignment and without doubt worsen its optical performance. There are good reasons for the dozens of calibration marks all over the lens barrel of the scanner Nikkor 100 mm (see below) and for the thread sealant locking all the metal parts together. Some second-hand sellers succumb to the temptation of disassembling lenses and cleaning their inner elements. They instinctively equate a cleaner lens with an easier sale and/or a higher price. When you purchase a whole scanner to salvage the lens, the safest choice would be a scanner that was never opened by the seller, although this does not guarantee against molds in the lens, or "monkey business" by a previous user. If the first-surface mirror that redirects light toward the lens is dusty, this is a good sign and means that the scanner probably has not been cleaned in years. In film scanners, this mirror is the part most likely to collect dust and require cleaning. Some of the finest dust, but not much, can make its way to the lens outer surfaces. Minolta Dimage Scan Elite 5400This 135 film scanner was introduced in 2003, and replaced in 2005 by the Dimage Scan Elite 5400 II, which uses the same optics. According to filmscanner.info, this scanner was alone among the tested scanners to reach an effective resolution on the subject side of 4,200 dpi at the time of the test (2005). Instructions on removing the lens from the scanner are available on closeuphotography.com. The lens barrel is a black brass cylinder with two deep grooves. A brass-colored marking indicates the barrel end facing toward the film in the scanner. 
RafCamera makes an adapter for mounting this lens on a female RMS thread. The lens of this scanner performs exceptionally well on sensors up to APS-C size. Tests are available on closeuphotography.com, as well as comparisons at 2x magnification with other lenses. It would make little sense for me to duplicate these already published tests. I only need to add here some basic information about this lens and its use in the scanner. In particular, the sensor of the Scan Elite 5400 II scanner has a 43.5 mm long active area. Since the scanned film width, according to the specifications of these scanners, is 24.51 mm, the lens magnifies the subject by 1.78x onto the sensor. It is therefore reasonable to assume that the lens is optimized for about 1.78x magnification (disregarding the fact that a few dozens of pixels at either end of the scanner sensor are not recorded in the image file). Tests at 1.2x and 2x produce excellent results, showing that this lens is tolerant of changes in magnification, at least on APS-C sensors. The sensor length of the scanner suggests that the lens covers a full-frame sensor (which has a diagonal of 43.3 mm) when used at the same magnification. However, my initial tests at 2x show a detectable curvature of field on the 42 Mpixel full-frame sensor of the Sony Alpha 7R II. Also, in the same conditions the lens resolves a ruler with ticks spaced 10 µm apart in the center of the frame. It still resolves them (albeit less clearly) halfway toward a short edge of the frame, after refocusing to eliminate the field curvature. It no longer resolves them at the edge of the frame, even after refocusing. Field curvature is of course not a problem when using focus stacking, but it means that focus stacking is in practice obligatory for maximum resolution with this lens at 2x, even when imaging a flat subject perpendicular to the optical axis of the lens. For magnifications above 1x, this lens should be used in the same orientation as in the scanner, i.e. with the brass-colored marking toward the subject. The focal length of this lens is 36 mm (calculated from the fact that increasing the lens extension by 29.5 mm increases the magnification by 0.82x). It appears to have an internal fixed aperture that reduces vignetting and may or may not reduce the lens speed, so the f/2.5 aperture calculated from the diameter of the front element (14 mm) might in reality be anywhere between f/2.5 and f/2.8. |