Olympus Tough TG-4Over the years, Olympus has marketed several models of moisture- and water-resistant compact digital cameras in the Tough series. This page discusses the TG-4 model with 16 Mpixel sensor. The current corresponding model is the TG-6 (12 Mpixel). A TG-7 model has apparently been in the works for a few years, but has been delayed by the sale of the Olympus camera division in 2020 and its renaming to OM System. Rumors are still coming of a future OM System TG-7, but at the time of writing (January 2023) nothing has been confirmed yet. 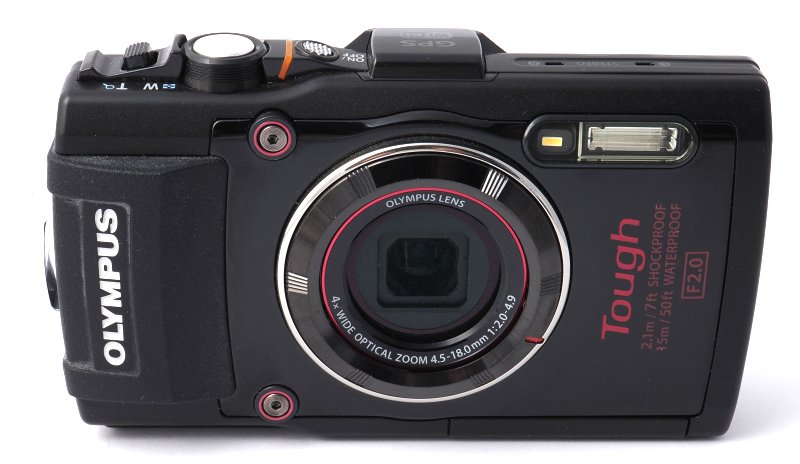
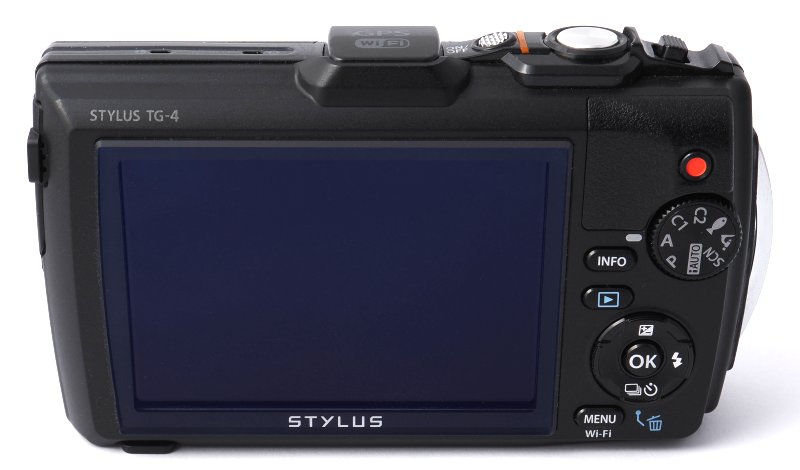
A few years ago, I purchased an Olympus TG-4 to use on those occasions when I don't want to, or cannot, carry a system camera and lenses, but still want to have at hand something better than a mobile phone. Contrary to the hype of mobile phone makers, I am fully aware, from personal experience as well as third-party tests and reviews, that even a compact digital camera gives better pictures than a mobile phone. This includes the latest mobile phones equipped with multiple cameras. While this subject deserves a more detailed discussion, the latter is best left for a separate, future page on this site. In the meantime, you can check out e.g. Smartphones vs cameras on DXOMark, iPhone 14 Pro VS 13 year old camera on YouTube, and Garbage Image Quality of Camera Phones with HEIC or JPEG on diglloyd. If you want the short-short version: smartphones use large amounts of image post-processing to to try and hide their real image quality (i.e. the "Fake it if you cannot make it" approach), but their image artifacts tell the true story, if you know what to look for. Dedicated digital cameras and phone cameras developed at the same time do use the same technology, and phone cameras, because of their space, weight and energy constraints, will continue to trail far behind contemporary dedicated cameras for the foreseeable future. Eventually, both types of cameras may get so good that their intrinsic differences, while still present, no longer matter in practice for most uses of the images, but we are still far from that time. Phone cameras, at present, are good enough for casual image watching on the small screens of mobile phones and for publishing low-resolution images on the web, but little more. Camera design, capabilities and accessoriesThe 1/2.3" sensor (6.17 x 4.55 mm) is quite small, but the image quality is slightly better than I expected on the basis of sensor size. Of course this is neither a camera for low-light photography, nor a replacement for a system camera. Sensor-shift image stabilization is available. If you are used to digital system cameras and/or high-end digital compact cameras, you may be surprised by the internal design of the TG-4. The lens has a fixed f/2 aperture when zoomed out (f/4.9 when zoomed in). The camera "stops down" to f/2.8 and f/8 by inserting two ND filters into the optical path. This design choice ensures that the lens always works at its optical optimum, which is necessary for avoiding the diffraction blur caused by narrow diaphragm apertures on the small sensor. Thus, with this camera you only stop down when there is a lot of ambient light, not for increasing DOF. There is actually one way to increase DOF with this camera, and it is by zooming in with the lens optical zoom, which increases the lens aperture by roughly two and a half stops at the telephoto end of its range. The camera is specified as waterproof down to a depth of 15 mm. The two doors (one for the connectors, the other for battery and memory card) are sealed with o-rings and have a safety toggle that prevents the door latches from being accidentally opened in the field. In principle, all controls can be operated with the right hand, while holding the camera with this hand only. In practice, two hands are better to hold the camera still. A lanyard attaches to a sturdy metal eyelet on the right side of the camera, and can be used as a wrist strap. There are no attachments for a conventional neck strap. There is no external hot shoe. In its place is the plastic cover of the GPS and Wi Fi antenna. There is no eye-level viewfinder, either, only a 3" non-articulated rear LCD screen that covers most of the rear camera surface. 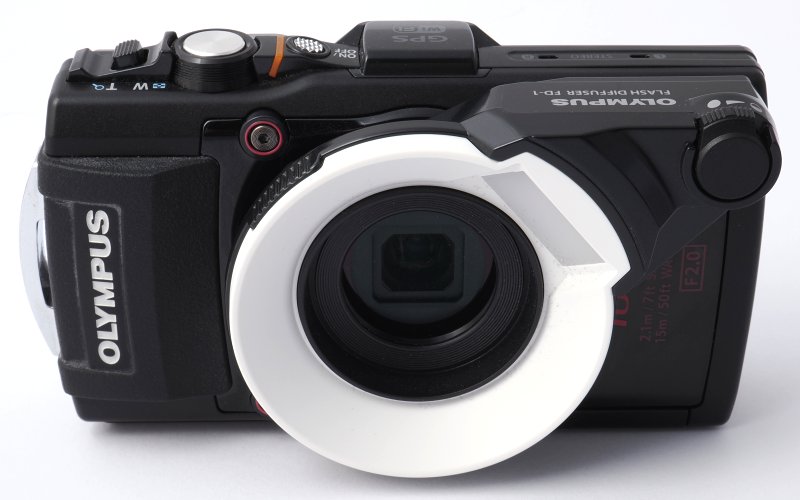
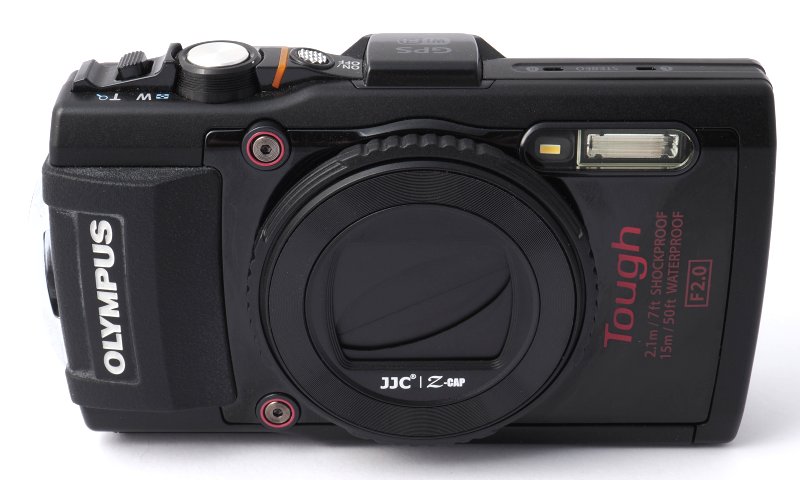
The camera comes with a decorative metal ring attached around the lens with a proprietary bayonet. No lens cover is supplied. This metal ring can be replaced with a few accessories of different function and usefulness. An FD-1 flash diffuser ring (first picture above) acts like a miniature ringlight and is extremely useful to improve the illumination of the built-in flash in macrophotography. A knob slightly adjusts the balance between direct and diffused flash light. Because of its shape, this diffuser essentially eliminates the problem of providing external illumination when photographing at the very close distances this camera is capable of. This is a must-have accessory for close-up and macrophotography with the TG-4. Copies of this diffuser made in China are available, but I have not tested them. There is also an LG-1 ring-shaped diffuser sometimes advertised at fantasy prices on eBay, which Olympus describes as a light guide for the camera LED. It is narrower than the FD-1, less projecting, and does not have an adjustment knob. It might be a good alternative if the FD-1 seems to take too much space (the camera with FD-1 might not fit into some especially tight camera bags), but the FD-1 described above probably does a better job of illuminating a close subject. A remarkably expensive replacement ring (second picture above) can be twisted close to protect the lens with a shutter-like cover. Copies of this lens cover made in China (the one shown is branded JJC), while still overpriced, cost only one-third and are functionally identical. A different plastic ring allows the use of screw-in filters and an ordinary lens cap. Telephoto, wideangle and fisheye add-ons are also available. All these accessories remain compatible across models of this camera, at least from the TG-3 to the TG-6. Some are advertised as compatible from the TG-1 through TG-6. A flexible "skin" of silicone rubber can be mounted onto the TG-4 to better protect it from sand, dust and scratches. I have not tried it, but I doubt it would be effective against dust and sand in the long-term. In my experience, it might even make things worse by trapping dust between skin and camera and making the skin work like sandpaper. If you use it, you should get into a habit of removing the skin after a day on the beach, then rinse both skin and camera carefully and let them dry. Third-party diving housings are available, and most likely are safer than taking the unprotected TG-4 into the sea for an extended time. They cost about the same as the camera itself. The camera can save images both in JPG and raw (Olympus .ORF) format, but this setting is enabled only in single-shot exposures and disabled in all sequence, focus stacking and focus bracketing modes. In the latter modes, only saving in JPG format (16 Mpixel, 8 Mpixel or VGA) is allowed. Both a built-in LED illuminator and a built-in electronic flash are present. The latter is a tiny xenon-tube strobe, not an overloaded power LED like in the large majority of mobile phones. The camera comes without an external battery charger. Only a small USB 2 power adapter and cable are supplied, and are used to charge the battery in-camera. Instead of a standard USB connector, the camera has the proprietary connector used by other Olympus cameras of the time, including the E-M1 I. The same connector is also used for a wired shutter remote control, or to download images to a computer. 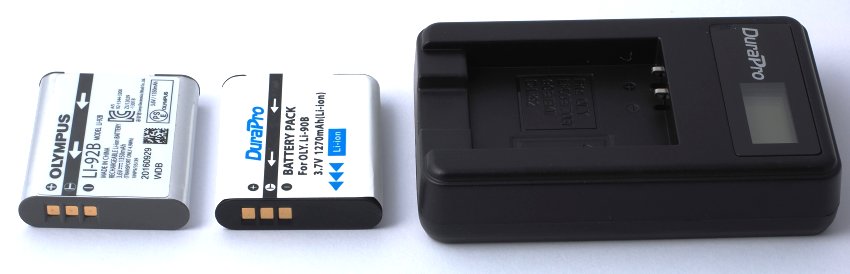
The LI-92B battery of the TG-4 is small and operation time on a battery charge is limited, especially when using the menus, playback, GPS, and/or Wi Fi. The battery that originally came with my camera completely discharges in about ten days even if the camera is never switched on. This is a problem for a camera that is supposed to be available to take with me at a moment's notice, so I bought a set of two third-party equivalent batteries, two plastic boxes for storing the batteries, and one USB-powered charger for less than half the price of one genuine LI-92B. The charger also works well with the genuine battery, and stops charging it when fully charged. So far the new batteries remain charged for a significantly longer time than the original one when left in the camera. For safety reasons I am not going to recharge the third-party batteries in the camera, and will instead use the external charger (so that, if one of the batteries should swell, leak or catch fire during recharging, it will not destroy the camera). Mode dialThe mode dial has the following positions:
MenusSeveral operating parameters are not found in the menu accessed with the Menu button (henceforth called the "Menu menu"), and are instead available as a column of icons along the right side of the LCD screen, which the user guide calls Function menu. The settings are chosen with the arrow pad (a.k.a. 4-way dial) and its OK center button. The Function menu roughly corresponds to the SCP (Super Control Panel) of Olympus/OM System Micro 4/3 system cameras, except that the Function menu is always displayed, contains fewer settings, and does not duplicate functions already available in the Menu menu. The Function menu contains the following settings, accessible with the vertical arrow buttons, from top to bottom. The choice for each settings are accessed with the left and right arrow buttons.
The rest of this section briefly describes the settings available in the Menu menu, opened by clicking the Menu button. The Menu menu is subdivided into seven tabs: Camera Menu 1, Camera Menu 2, Movie, Playback, Settings Menu 1, Settings Menu 2, and Settings Menu 3. Camera Menu 1
Camera Menu 2
Movie menu
Settings Menu 1
Settings Menu 2
Settings Menu 3
Macro capabilitiesThe TG-4 focuses fairly close in normal operation. Optically zooming to maximum focal length results in maximum magnification of a small subject. The Microscope mode provides extreme macro capabilities, although at the expense of a very short working distance. The flash diffusor sold as a separate accessory is very useful also in this mode. Focus stacking corrects for tilt and shift variations of individual images, and works fairly well hand-held. It uses the LED as illumination source, rather than the flash, and limits the resolution of the stacked image to 8 Mpixel. 
Full image, reduced. The field of view is approximately 15 mm across. The above image is an example of medical documentation shot hand-held with the TG-4. The lens was zoomed to its longest focal length. Image qualityThe following test images were shot at f/2 and ISO AUTO in aperture priority mode. "1x zoom" refers to the minimum focal length of the lens (4.5 mm). 
Full image, reduced. 
1:1 crop of central portion of preceding image. 
1:1 crop of left edge of image. Lens performance is best at 1x zoom. The center is quite sharp even at 16 Mpixel resolution. The sides do show some lateral chromatic aberration and overall lower resolution. Lens performance becomes more uniform across the frame when zooming in, with the sides increasing in resolution but the center moderately decreasing. 
Full image, reduced. 
1:1 crop of central portion of preceding image. Lens performance is still good at maximum optical zoom, considering this is a digital compact camera with a small sensor and a small fixed-aperture zoom lens. 
Full image, reduced. 
1:1 crop of central portion of preceding image. At 8x Super Res Zoom, artefacts are amplified by digital zooming and interpolation, and clearly visible. There is no detectable increase in real resolution, compared to the image at 4x optical zoom. Olympus' claims of Super Res Zooming "without deteriorating image quality" must be taken with a grain of salt. With Super Res Zoom, the amount of visible detail is indeed roughly the same as without Super Res Zoom, no lesser and no more, but the visual perception is a clearly fuzzier image when Super Res Zoom is used. You can get a better result by shooting without Super Res Zoom and de-noising and upscaling the image with modern AI-based software, with the dual advantages of twice the angle of view of the in-camera zoomed image and a visually more credible enhanced resolution. 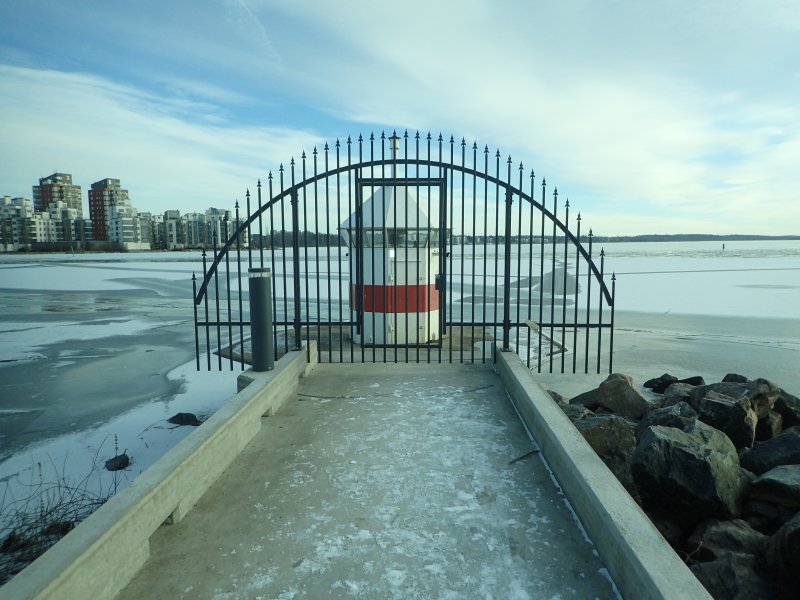
Full image, reduced. At 1x zoom, the "wideangle perspective rendering" is well visible. The 4 mm focal length is equivalent in angle of view to approximately 23 mm on full-frame (24 x 36 mm), so it is a respectable wideangle. 
1:1 crop of central portion of preceding image. This image was saved in-camera at 8 Mpixel resolution. As a result, the 1:1 crop is very sharp in the center. 
1:1 crop of left margin of same image. There is a moderate reduction in resolution along the sides of the image, but quite acceptable for most uses of the 3,200 x 2,400 pixel image. You could in fact display this image at 1:1 on a 4k screen (3,840 x 2,160 pixels), use most of its width, and still need to do some cropping of the original image along its height. Some of the fuzzines in the last image is due to the buildings in the background being slightly out of focus (focus was set on the metal fence, partly visible at the bottom right of the last image. As discussed above, the lens of this camera has no adjustable diaphragm, and "stopping down" actually inserts neutral density filters in the optical path, which do not affect DOF. Therefore, there is no practical way to increase DOF (except by zooming the lens in, which increases its aperture). The physically small sensor also means that diffraction by the f/2 lens is already close to being the limiting element to the camera's resolution. DocumentationThe 121-page manual summarily describes many other functions and settings. I am not aware of good-quality books for this camera, but there is an extensive review on DPreview that may be useful. Subsequent modelsThe 16 Mpixel sensor of the TG-3 and TG-4 was replaced, in subsequent models, by a 12 Mpixel sensor. Possibly this gives a slightly better low-light performance. In fact, the TG-6 reaches an ISO 12,800 sensitivity, while the TG-4 only 6,400. The TG-5 has a redesigned zoom lever, adds manual focus with focus peaking, and can wirelessly control remote Olympus electronic flashes, together with other enhancements. The TG-6 has a higher resolution LCD screen, but as far as I can see, when it comes to features that affect image quality, it provides essentially the same functions as the TG5. Both models reach a higher video resolution than the TG-4. ConclusionsThe Olympus TG-4 is a toughened and water-proof compact digital camera with several interesting functions, at a price higher than a typical digital compact camera but proportionate to the capabilities provided by this model. The camera can be equipped with accessories, especially a dedicated flash diffuser, that enhance its usefulness. |